Master the Art of Roasting: Proven Techniques to Achieve Perfectly Cooked Meats Every Time
Your oven is the heart of your kitchen, making it vital to understand its inner workings to excel in the craft of roasting. If your goal is to create succulent roasts, mastering your oven’s capabilities can transform your cooking from mere attempts to delicious accomplishments, consistently yielding juicy and tender dishes that will delight your taste buds.
Discover Various Oven Types to Elevate Your Roasting Expertise
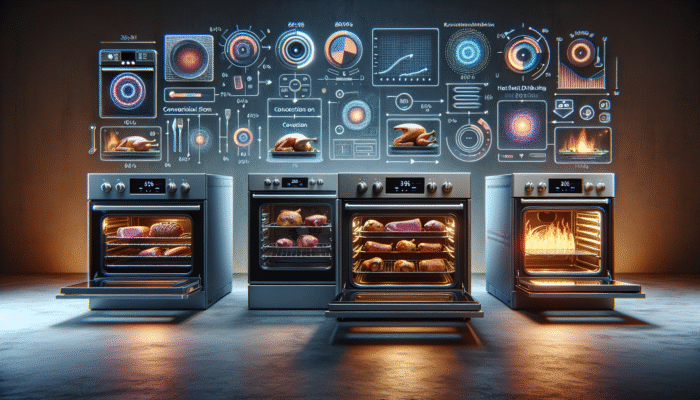
Recognizing that not all ovens operate the same way is essential for successful roasting outcomes. Whether you utilize a conventional, convection, or gas oven, each type has distinct features that significantly impact heat distribution and cooking efficiency. Conventional ovens may exhibit uneven heat zones, resulting in unpredictable cooking results. Conversely, convection ovens leverage a fan to circulate hot air, promoting consistent cooking throughout your roast. To expertly navigate the path to perfectly cooked roasts, familiarize yourself with the unique characteristics and limitations of your specific oven model.
Dedicate time to experiment with the diverse settings of your oven to understand their effects on cooking time and temperature. For example, you may discover that a convection oven often requires a lower temperature than a conventional oven for similar results. Learn the specific idiosyncrasies of your appliance: does it typically run hotter or cooler than the stated temperature? Take note of how long it takes to reach your desired temperature and make adjustments as needed to optimize performance.
Moreover, the placement of your roast within the oven is crucial for achieving even cooking. Ideally, position your roast in the center of the oven to encourage optimal heat circulation. If you’re using multiple racks, remember that the top rack usually cooks faster than the bottom; rotate your roast as necessary to avoid charring and ensure a consistently delightful result.
Achieving Accurate Oven Temperatures for Consistent Roasting Success
An oven thermometer is an indispensable tool for anyone looking to perfect their roasting skills. Many ovens can deviate by as much as 25 degrees Fahrenheit (approximately 14 degrees Celsius), potentially leading to overcooked or burnt meals. By placing an oven thermometer inside, you can verify that the temperature you’ve set matches the actual cooking temperature, providing a reliable foundation for your culinary explorations.
Consider this: if you’re following a recipe that specifies a particular temperature but your oven operates at a higher setting, you may be setting yourself up for failure. Regularly calibrating your thermometer will help maintain its accuracy, paving the way for your successful mastery of how to achieve perfectly cooked roasts.
The Crucial Role of Preheating Your Oven for Culinary Success
Never underestimate the importance of preheating your oven. Allowing ample time for your oven to reach the desired temperature before placing your roast inside is essential for promoting even cooking. A general guideline is to preheat your oven for at least 20 to 30 minutes.
Preheating not only sets the stage for your roast to cook evenly but also aids in developing a beautiful crust that enhances flavor. If you’re using a covered roasting pan, preheating it as well can create a steaming effect, helping to retain moisture within your roast, leading to a more enjoyable dining experience.
By ensuring your oven is thoroughly preheated, you significantly diminish the chances of burning your roast. Remember, patience is a virtue in the culinary world, and it pays off with delectable results.
Selecting the Ideal Cut of Meat: Your In-Depth Guide to Perfect Roasting
When embarking on your roasting journey, the selection of the meat cut is of paramount significance. Choosing the right cut not only enhances flavor but also plays a vital role in avoiding burnt roasts and ensuring an enjoyable dining experience.
Selecting Premium Quality Meat for Successful Roasting
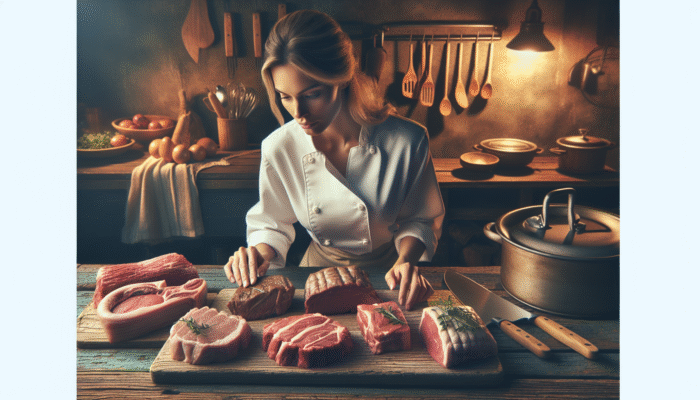
Opting for a meat cut that is ideal for roasting is essential for guaranteeing a successful outcome. Cuts like rib roast, tenderloin, and pork loin are excellent options due to their tenderness and favorable fat content. It is advisable to steer clear of lean cuts that often dry out during cooking, as this can lead to burnt edges and an unappetizing texture.
Additionally, the source of your meat is of considerable importance. Grass-fed or organic options typically yield superior flavor and moisture content. Whenever possible, purchase your meat from local butchers who can offer valuable insights into the best cuts for roasting, ensuring you make informed choices.
Do not shy away from cuts with ample marbling; the fat within these cuts enhances flavor and moisture, facilitating a more forgiving cooking experience. The right choice of meat lays the groundwork for a roast that is sure to impress your guests and loved ones alike.
Understanding the Role of Fat Content in Cooking Success
The fat content in your selected cut of meat is a critical factor in determining cooking time and temperature. Fat functions as a natural insulator, effectively retaining moisture and preventing the meat from drying out during the roasting process. However, excessive fat can lead to flare-ups and burnt exteriors, which should be avoided.
As you prepare your roast, pay close attention to the distribution of fat. A well-marbled cut will cook evenly, while a leaner cut may require more vigilant monitoring to avoid burning. If necessary, consider trimming excess fat strategically—just be cautious not to remove too much, as some fat is essential for flavor and moisture retention.
When cooking, it’s vital to remember that fat renders as the meat cooks, adding both flavor and moisture. Understanding how fat behaves during roasting can help you control the outcome and steer you toward roasting success.
Recognizing the Importance of Size and Shape in Roasting
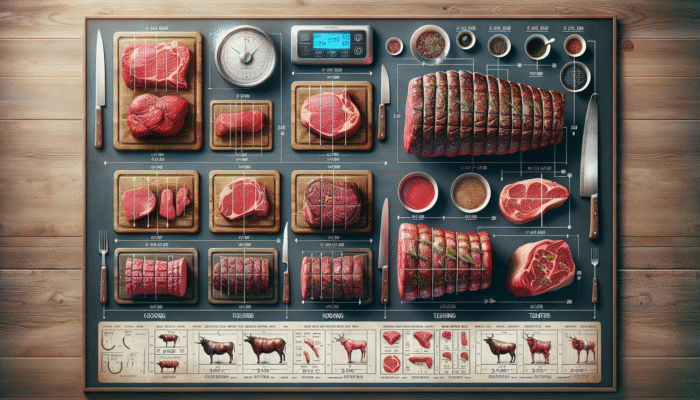
The size and shape of your roast are crucial factors influencing cooking time and temperature. Larger roasts necessitate longer cooking durations, while smaller cuts may cook more quickly. To ensure even cooking, choose cuts that are approximately uniform in shape and size.
As a general guideline, always weigh your roast and consult cooking charts that provide time estimates based on weight. Keep in mind that larger cuts often benefit from lower temperatures and extended cooking times, while smaller cuts can tolerate higher heat for quicker results.
By being mindful of the size and shape of your roast, you can sidestep common pitfalls of overcooked exteriors and undercooked interiors—two scenarios that can easily lead to an unsatisfactory roast and disappointment.
Preparing Your Roast: Setting the Stage for Culinary Success
Preparation is a vital component of roasting. Taking the time to properly prepare your roast not only enhances its flavor but also safeguards against burning, ensuring you are well on your path to culinary excellence.
Trimming Excess Fat for Consistent Cooking
Begin by trimming any unnecessary excess fat from your roast. While some fat is crucial for flavor and moisture retention, too much can lead to flare-ups and charred surfaces during cooking. Utilize a sharp knife to carefully remove thick layers, leaving just a thin layer intact to enhance flavor.
Trimming excess fat creates a more even cooking surface, allowing heat to penetrate the meat more effectively. It also minimizes the risk of creating excessive smoke, which can compromise the overall taste of your roast.
When readying your roast, remember that sometimes less is more. A thoughtfully trimmed roast can result in a more delicious and visually appealing dish, laying the foundation for a successful first roasting experience.
Expert Seasoning Techniques for Amplifying Flavor
Even seasoning of your roast is essential for enhancing flavor without risking a burnt exterior. A well-seasoned roast not only tastes fantastic but also aids in forming a beautiful crust. Use a mix of salt, pepper, and your favorite herbs—garlic, rosemary, and thyme are particularly effective.
Be generous with your seasoning, but avoid piling it solely on the surface; rub the seasoning into the meat to ensure an even distribution of flavors. Consider allowing your roast to sit with the seasoning for at least 30 minutes before cooking, giving the flavors time to penetrate deeply.
For an added layer of flavor, consider marinating your roast before cooking. A marinade can create a protective layer that boosts moisture and flavor while also helping to prevent the outer surface from burning during the roasting process.
Bringing Your Roast to Room Temperature for Optimal Results
Allowing your roast to reach room temperature prior to cooking is a transformative step. When meat is cold, it requires longer to cook through, often resulting in a burnt exterior and an undercooked interior.
Remove your roast from the fridge about 30 to 60 minutes before cooking, depending on its size. This step fosters a more even cooking process and helps achieve that ideal juicy finish. The end result? A tender roast cooked to perfection, showcasing your newly honed skills in preventing burnt roasts.
Cooking Techniques: Elevating Your Roasting Mastery
Once your roast is adequately prepared, it’s time to dive into the cooking techniques that will enhance your roasting prowess. Mastering these methods will not only help you avoid burning your roast but also empower you to create mouth-watering dishes that are sure to impress everyone at your dinner table.
Choosing the Right Roasting Method for Desired Outcomes
Selecting the appropriate roasting method is crucial, as it directly affects the results you achieve. For instance, slow roasting is ideal for tougher cuts that require low and slow cooking to break down muscle fibers and render fat. This method guarantees a more uniformly cooked roast that melts in your mouth while significantly reducing the risk of burning.
Conversely, high-heat searing can create a fantastic crust on the exterior while locking in juices. However, mastering this technique is essential. Start with a preheated oven at a high temperature, then lower it after a brief period to ensure thorough cooking without burning the surface.
Regardless of the method you choose, remember that your oven’s unique characteristics will influence the final result. Adjust cooking times and temperatures based on your experiences, and soon you’ll expertly navigate the art of roasting.
The Vital Role of Basting for Optimal Moisture Retention
Basting your roast regularly during the cooking process is an excellent way to maintain moisture and stave off burning. As the roast cooks, the natural juices will baste the exterior, enhancing flavor and reducing dryness.
Use a basting brush or spoon to apply the drippings from the bottom of the pan onto the roast every 30 minutes. This straightforward action not only infuses moisture but also contributes to developing a rich, golden crust that adds visual appeal.
If you’re worried about burning, consider adding a splash of broth or wine to the roasting pan. This liquid creates steam, keeping moisture on the surface while allowing for even cooking throughout.
Utilizing a Meat Thermometer for Accurate Cooking
A dependable meat thermometer is a vital companion in your roasting journey. This invaluable tool allows you to monitor the internal temperature of your roast, ensuring it is cooked perfectly without the risk of overcooking.
Insert the thermometer into the thickest part of the roast, steering clear of bones and fat for the most accurate reading. Familiarize yourself with the recommended internal temperatures for different types of meat—typically, beef should reach around 135°F (57°C) for medium-rare, while pork needs to hit 145°F (63°C).
With a meat thermometer in hand, you’ll gain confidence in your capability to achieve the perfect roast while eliminating the fear of burning your meal.
Resting the Meat for Maximum Juiciness
Once your roast reaches the desired internal temperature, it’s essential to let it rest before carving. This crucial step allows the juices to redistribute throughout the meat, resulting in a tender and juicy finish.
Loosely cover the roast with foil and let it rest for at least 15 to 30 minutes, depending on its size. Skipping this critical step can lead to a dry roast, as the juices will run out when you carve it, leaving you with a less-than-satisfactory meal.
Resting isn’t just about enhancing flavor; it’s also vital for achieving an attractive presentation. As the juices settle, slicing becomes easier, resulting in neat and beautiful cuts that showcase your culinary efforts.
Perfecting Carving Techniques for an Impressive Presentation
Finally, the way you carve your roast can significantly impact the dining experience. Use a sharp, serrated knife for optimal results, and slice against the grain to maximize tenderness.
To create an impressive presentation, consider slicing the roast into even portions and arranging them attractively on a serving platter. Garnish with fresh herbs to elevate the visual appeal and leave a lasting impression on your guests.
The right carving technique completes your roasting journey, allowing you to showcase your skills alongside the juicy, perfectly cooked roast that you have carefully prepared while mastering how to prevent burnt roasts.
Mastering Timing and Temperature: Key Elements for Culinary Excellence
Timing and temperature are critical components in the art of roasting. Mastering these factors allows you to create a roast that is not only delectable but also perfectly cooked, all while avoiding the risk of burning.
Guidelines for Accurate Cooking Times
Getting the cooking time right is essential to prevent both undercooked and burnt roasts. As a general guideline, adhere to cooking time recommendations based on the weight of your roast. A good estimate for roasting beef is approximately 20 minutes per pound at 350°F (175°C), while pork may require around 25 minutes per pound.
Always factor in resting time, as this will affect the final cooking temperature. Utilizing a kitchen scale to weigh your roast ensures precise cooking times and helps you avoid the common pitfalls associated with overcooking.
Investing in a reliable kitchen timer can significantly aid in keeping you on track. Set it for the estimated cooking time and check for doneness diligently, making necessary adjustments to achieve that flawless roast.
Making Essential Temperature Adjustments During Cooking
Adjusting the oven temperature during the roasting process is often vital for preventing burning while ensuring the roast is cooked through. If you notice that your roast is browning too quickly, lower the temperature slightly to allow for more even cooking.
Flexibility in your approach is essential; making temperature adjustments is a normal aspect of cooking. Don’t hesitate to reduce heat if you sense that the exterior is cooking faster than the interior.
As you experiment with various cuts and sizes, you’ll develop an intuitive sense for when to make these adjustments. Before long, you’ll be adept at navigating the complexities of roasting without burning your culinary masterpiece.
Understanding the Importance of the Resting Period
The resting period is a crucial step in ensuring your roast turns out perfectly. Allowing your meat to rest for at least 15 minutes post-cooking not only aids in redistributing juices but also guarantees that your roast doesn’t continue to cook while it sits, which can lead to dryness or burning.
Loosely cover your roast with foil to retain heat while preventing moisture from being trapped. This simple practice can elevate your roast from ordinary to extraordinary, allowing you to create a dish that is both succulent and visually appealing.
Understanding and appreciating the significance of this resting period will be one of your most vital lessons on your journey to mastering how to prevent burnt roasts.
Vigilantly Monitoring Your Roast: A Key to Culinary Triumph
Maintaining a watchful eye on your roast throughout the cooking process is crucial to ensuring it emerges perfectly. Monitoring its progress allows you to avoid burning and enhances your overall roasting experience.
Conducting Visual Inspections for Consistent Cooking
Regularly check the color and surface of your roast to ensure it is not burning. A perfectly roasted piece of meat should have a rich, golden-brown exterior. If you observe any darkening or charring, it may be time to adjust the temperature or cover it with foil to prevent further damage.
Visual inspections also enable you to determine whether the meat is browning evenly. If one side is cooking faster than the other, consider rotating the roast or repositioning it within the oven for optimal results.
Being attentive to visual cues is essential for mastering how to prevent burnt roasts. Your observations will become one of your most valuable tools throughout this culinary journey.
Being Attentive to Smell and Smoke
Stay alert to any aromas or smoke that could signal your roast is overcooking. While a delightful fragrance should fill your kitchen, any acrid smells might indicate trouble, prompting you to take corrective measures.
If you detect smoke, immediately lower the oven temperature and continue to monitor your roast until it is cooked through. This level of vigilance will help you refine your skills and avoid burnt outcomes.
Developing a keen sense of smell while roasting will serve you well in your culinary adventures. Trust your instincts; they will guide you toward success in the kitchen.
Utilizing a Timer for Consistent Monitoring
Setting a timer is a straightforward yet effective strategy to remind yourself to check on your roast regularly. This practice helps prevent you from losing track of time, which can ultimately lead to unwanted burning.
Consider using multiple timers if you’re managing different roasts or side dishes, ensuring that nothing falls through the cracks during the cooking process.
Being proactive with a timer will keep you engaged and in control, making your journey to perfect roasting much smoother and more enjoyable.
Checking Internal Temperature for Cooking Precision
Utilizing a meat thermometer to monitor the internal temperature of your roast is crucial. Aim for the recommended temperatures for various meats: 135°F (57°C) for medium-rare beef, 145°F (63°C) for pork, and 165°F (74°C) for poultry.
Regular temperature checks will not only ensure that your roast is thoroughly cooked but will also help you avoid the dreaded overcooked, dry outcome that can lead to disappointment.
As you gain experience, you’ll develop an instinctive understanding of timing and temperature, making the practice of checking internal temperatures feel like second nature.
Tackling Common Roasting Challenges: Navigating Culinary Issues with Confidence
Even the most experienced cooks face challenges while roasting. Knowing how to troubleshoot common issues enables you to maintain control and avoid burning your roast.
Addressing Uneven Cooking for Consistent Results
If you encounter uneven cooking, rotating your roast and adjusting the oven rack position can make a significant difference. Ensure your roast is centered in the oven for optimal heat circulation.
Don’t hesitate to open the oven door to check the roast’s status; just be sure to do so quickly to retain heat. If one side is cooking faster than the other, rotate the roast halfway through cooking to ensure uniform results.
By taking these proactive measures, you’ll gain mastery in how to prevent burnt roasts and build confidence in your culinary abilities.
Identifying Hot Spots in Your Oven for Even Cooking
Recognizing and avoiding hot spots in your oven is essential for achieving even cooking results. In a conventional oven, certain areas may cook faster than others.
To identify these hot spots, conduct a simple test by placing slices of bread on different oven racks. The bread that toasts the quickest will reveal your oven’s hot spots. Once identified, position your roast accordingly to avoid these areas, minimizing the risk of burnt edges.
Being aware of your oven’s unique characteristics empowers you to take control of your cooking environment, ensuring perfect roasts each time.
Correcting Overcooked Exteriors During the Cooking Process
If the exterior of your roast overcooks while the interior remains undercooked, it’s time to adjust your approach. Lower the temperature or tent the roast with foil to shield the exterior while allowing the interior to catch up in cooking.
This technique is especially useful for larger cuts that may require additional time to cook through. As you become more familiar with roasting, you’ll learn to adjust your methods based on the feedback your roast provides.
By mastering these troubleshooting techniques, you’ll gain confidence and skill, ultimately making your journey toward perfect roasts a successful and satisfying one.
Prioritizing Safety and Hygiene: Ensuring a Safe Cooking Environment
In the culinary world, safety and hygiene should never be overlooked. As you embark on your roasting adventure, maintaining a secure kitchen environment is vital as part of the cooking process.
Practicing Proper Hygiene When Handling Raw Meat
Always ensure proper hygiene when handling raw meat. This includes thoroughly washing your hands before and after handling, utilizing separate cutting boards, and sanitizing surfaces to prevent cross-contamination.
Raw meat should be stored in the refrigerator until you are ready to prepare it. Avoid leaving it out for extended periods, as this can lead to bacterial growth and compromise food safety.
By adhering to robust hygiene practices, you will not only ensure a safe cooking environment but also enhance your overall experience of how to prevent burnt roasts.
Commonly Asked Questions About Roasting
What is the optimal oven temperature for roasting?
The ideal oven temperature for roasting typically hovers around 350°F (175°C) for consistent cooking results. Adjustments may be necessary based on the specific cut and desired doneness.
How do I determine when my roast is cooked?
Utilize a meat thermometer to check the internal temperature. Beef is generally considered medium-rare at 135°F (57°C), while pork should reach 145°F (63°C) for safe consumption.
Can I roast meat straight from the freezer?
Roasting frozen meat is not advisable, as it can lead to uneven cooking and elevate the risk of bacterial growth. Always ensure your meat is thoroughly thawed before roasting.
How frequently should I baste my roast?
Baste your roast every 30 minutes to keep it moist and enhance flavor. This practice also contributes to the development of a delicious crust.
Is resting my roast after cooking necessary?
Yes, allowing your roast to rest for 15 to 30 minutes facilitates juice redistribution, resulting in a more tender and flavorful meal.
What should I do if my roast starts to burn?
If your roast begins to burn, immediately lower the oven temperature and tent it with foil to protect the surface while it continues to cook through.
Can I use a marinade on my roast?
Absolutely! A marinade enhances flavor and moisture retention. Just ensure to pat the surface dry before roasting to avoid excess moisture.
What are the best cuts of meat suitable for roasting?
Cuts like rib roast, tenderloin, and pork loin are excellent choices for roasting, as they are known for their tenderness and desirable fat content.
How should I slice my roast for serving?
Use a sharp serrated knife and slice against the grain for maximum tenderness. Arrange the slices neatly on a serving platter for an appealing presentation.
What should I do if my roast cooks unevenly?
Rotate your roast or adjust its position in the oven to ensure even cooking. If necessary, cover it with foil to prevent burning while allowing it to cook through.
Join Our Community on Facebook!
The post How to Avoid Burning Your First Roast: Essential Tips appeared first on https://cookinggods.com
The Article Essential Tips to Avoid Burning Your First Roast Was Found On https://limitsofstrategy.com
The Article Avoid Burning Your First Roast with These Essential Tips First Appeared ON
: https://ad4sc.com


Comments are closed